Manage Teams & Users in TerminusCMS
Manage Your Teams
TerminusCMS generates a team based on your registration credentials.
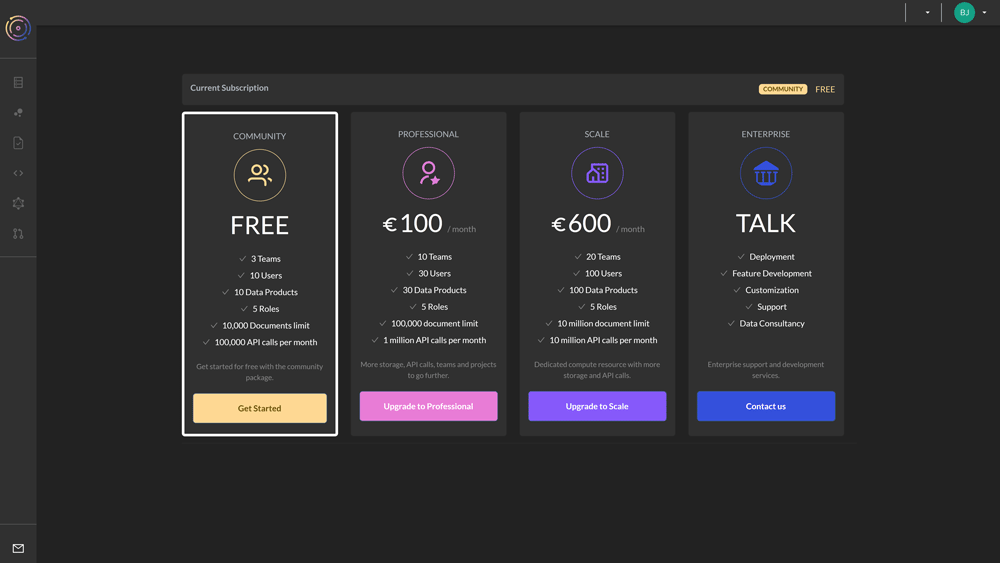
The pricing page is the first screen displayed when logging in for the first time, click on 'Get Started' under the community package. The next screen is the teams home page that lists all of the teams a user belongs to.
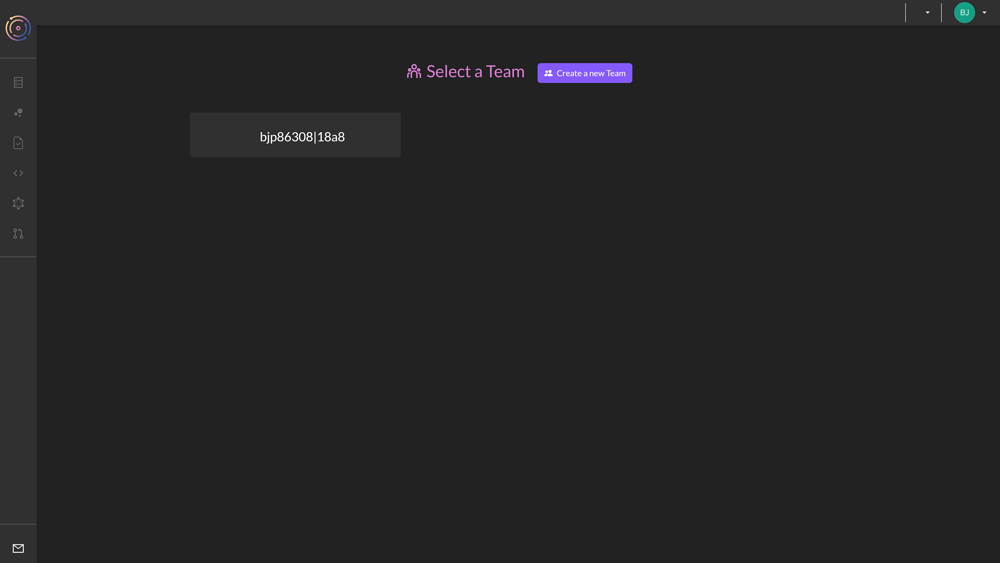
Create a new team or select the autogenerated team. All of the teams a user is a member of will appear on the team's home page. Switch between teams using the dropdown from the top menu.
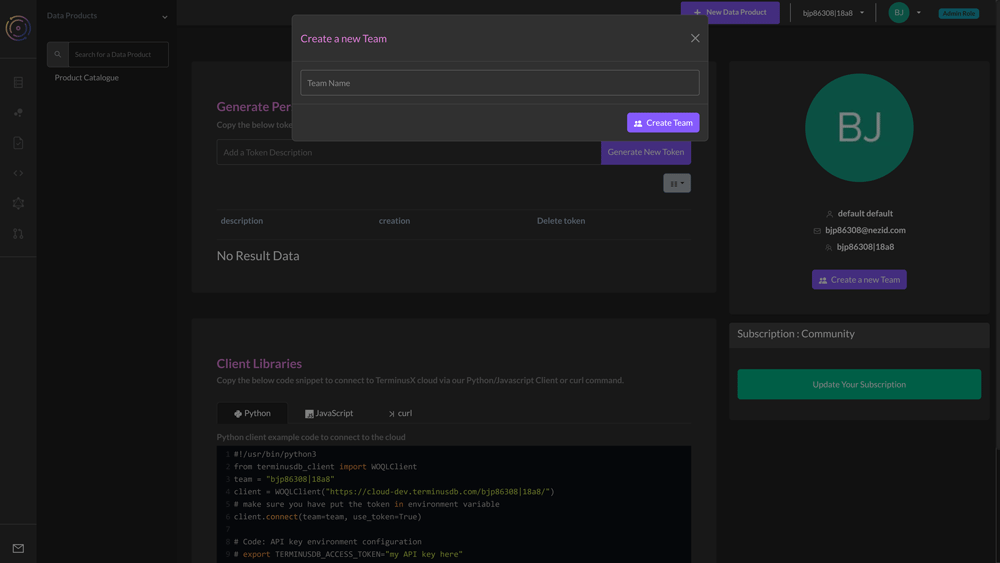
To create a new team from the top menu:
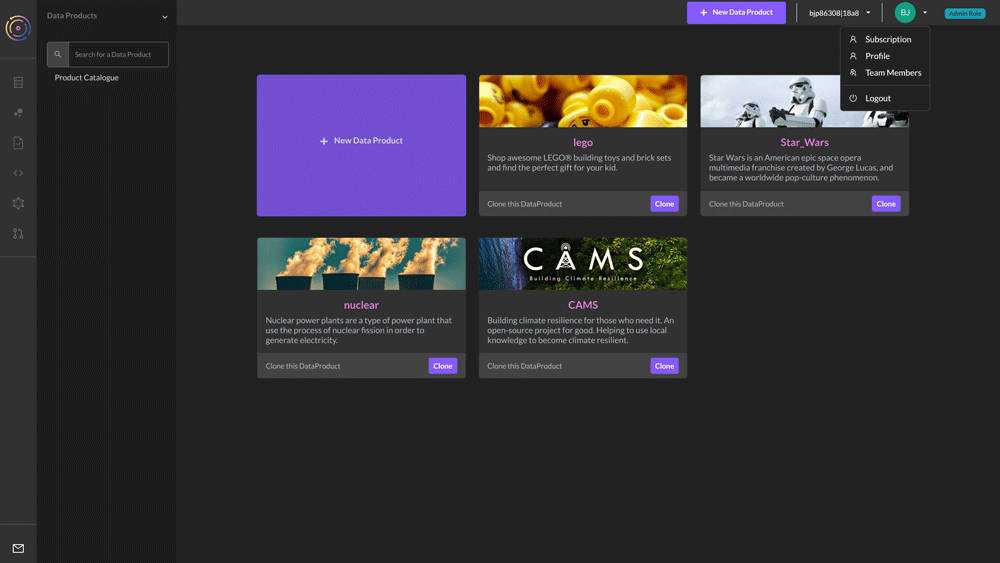
- Click the arrow next to the profile icon in the top right corner.
- Select profile.
- From the resulting window, select ‘Create a new team’
- Name the team - note that no two team names can be the same.
Adding Users
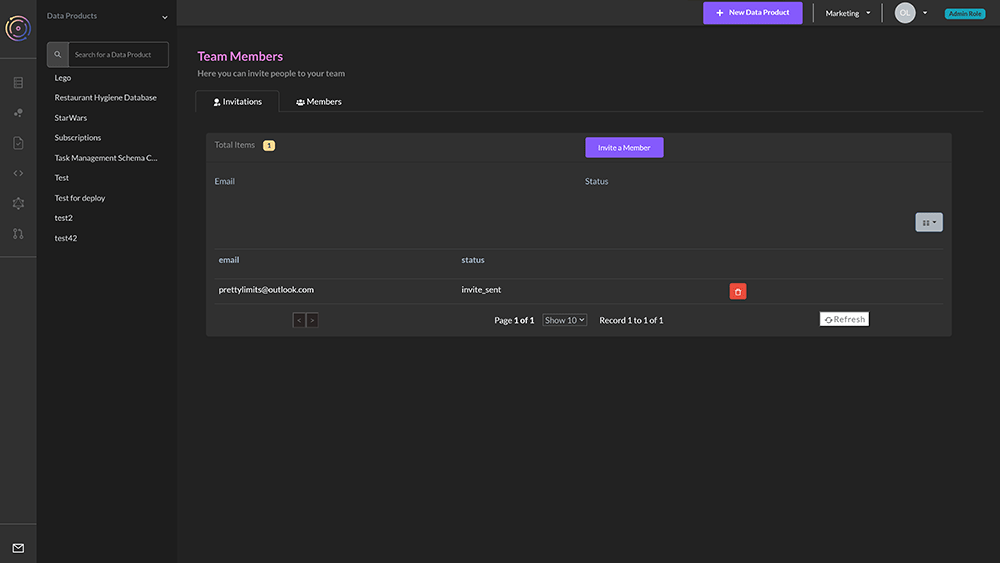
To invite team members and manage the team, do the following:
- Click the arrow next to your profile icon in the top right corner
- Select 'Team Members'.
- In the following screen, select 'Invite a Member'.
- In the pop-up window, enter the user’s email address and select one of the following access permissions - _this will be applied to team-level permissions so will apply to all data products within your team. If you want to only give read-write access to a specific data product, it makes sense to give the user low-level permissions and assign higher permissions for that data product only - we will explain this next_.
- Admin - can add and remove users and permissions and has total access to data products
- Collaborator - Able to access data products.
- Data Updater - Read and write access to data products.
- Data Reader - Read-only access to data products.
- Info Reader - Schema-level access but not data-level access.
- The user will be sent an email with a link they need to click (if they don’t receive it, tell them to check their spam folder).
- When the user has accepted the invitation, their details will display within the Team Members section.
Editing & Removing Users
To edit the role given to a user:
- Navigate to the Team Members section from the profile dropdown.
- Find the user to change from the list and click on the second icon.
- From the pop-up window, select the new role to give them.
To delete a user from a team, do the same as above, but select the third icon in red.
Hover over the icons for information about what they do.
Granular Permissions
Grant different permissions for different data products/projects. To do this do the following:
- Navigate to the Team Members section from the profile dropdown.
- Find the user to add specific data product permissions for and click on the first icon.
- The resulting table below will list all of the data products in the team.
- Choose the data product to change the user’s role for by clicking on the edit permissions icon.
- Choose from the list of permissions
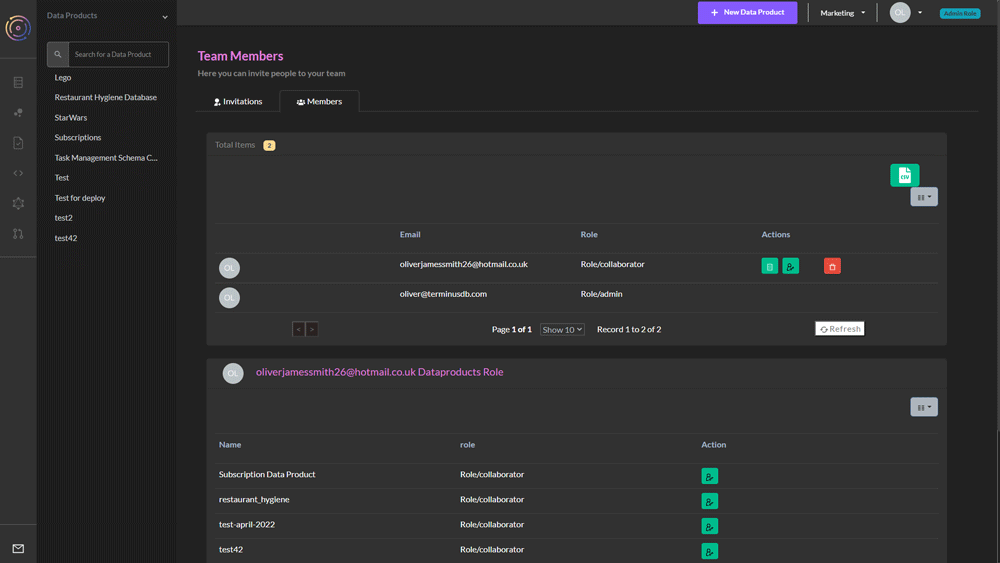
Users can only have permissions higher than the team permissions, so if someone needs read/write permissions for only one data product, ensure that the team permissions are set at a lower level.